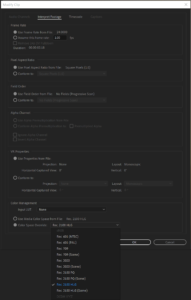
 The newest release of Premiere Pro 14.4 includes support for HDR editing. Technically, HDR has been supported in Premiere Pro since 2015, but only if you were using OpenEXR frame sequences, and with other severe limitations. This release finally includes a fully developed workflow for editing and finishing projects in HDR. The most important piece of that puzzle, is that image processing is no longer only being computed in the Rec.709 color space. Premiere correctly understands various color space formats, and can process them correctly. The interpret footage dialog box now has a color management section, where users can choose between Rec.601, Rec.709, Rec.2020, Rec.2100 HLG, and Rec.2100 PQ, and there is an option to assign input LUTs to source footage as well.
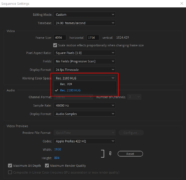
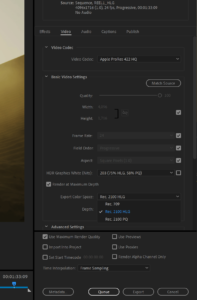 The sequence settings dialog box now offers the options of Rec.709 and Rec.2100 HLG in the Working Color Space drop down menu. Similarly, the export options now have HDR variables for certain formats. H.264 and HEVC files can be exported for delivery in HDR10 with the correct metadata attached, and HDR content can also be exported as ProRes, X-AVC Intra, or JPEG2000.
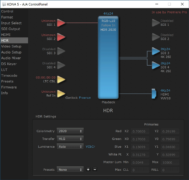 Currently, the big caveat is in monitoring. You do want to see what your HDR content looks like, right? The challenge is that the image has to go from the software application, through Windows, to the graphics driver, over a digital cable to an HDR display, and then be correctly interpreted on that end to be viewed correctly. The last three steps have a solution that has been standardized as HDMI-2.0b, but the step going through the operating system and graphics driver introduce many variables that could be changed by Microsoft, Apple, Nvidia, AMD, or Intel. So the only reliable way to view your HDR content in Premiere, is with a dedicated hardware output that supports Adobe’s Mercury Transmit. This becomes the reliable link between the software application, and the HDMI 2.0 (or SDI) output, which can then be monitored in the standard ways. Currently supported hardware output options include AJA’s Kona cards and io4K Thunderbolt peripherals, and BMD’s Decklink cards. These are then connected to your HDR display, which could be anything from a consumer HDR TV, to a mastering quality Canon DP-V3120, which is what I tested with, powered by a Kona 5 card.
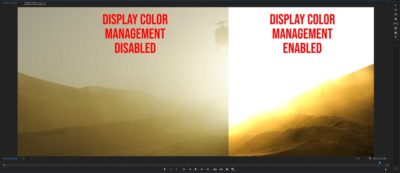
I tested connecting my HDR display to my Quadro GPU with an HDMI 2.0 adapter, and found that Premiere’s output, in both the Program Monitor Panel, and in full screen Transmit output, was limited to whatever I set the SDR application brightness to in Windows. Enabling Display Color Management in Premiere’s general preferences just caused all of the values above 100 to clip, instead of mapping the peak brightness to 100%. I don’t know if running it in OSX has the same results, but neither is officially supported by Adobe at the moment, because updates to the OS or the graphics drivers could have significant effects on the accuracy of that output. Someday, once operating systems and applications have their UIs optimized for HDR displays, this will be much simpler, but until that pipeline is standardized and streamlined, monitoring will be the hardest part of editing in HDR, or even just viewing HDR content on a computer.
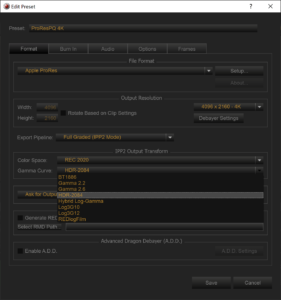 The first step in editing HDR content is getting your footage into a supported HDR format. Some cameras can shoot directly to HDR, like Panasonic’s GH5 recording to HLG HEVC files, or Sony cameras recording to X-AVC in HLG. Other cameras shoot RAW files that can be decoded or converted into HDR color spaces. Currently Premiere can’t decode R3D files directly into HDR, but RedCineX can be used to transcode R3D files to ProRes in either HLG or PQ, and these can be dropped right into Premiere HLG sequences. Ideally we will eventually be able to seamlessly edit R3Ds and other RAW files directly in Premiere sequences in HDR.
If your footage is in the correct format, it should import seamlessly into Premiere, and new sequences from those assets should automatically be in HLG. You will need to configure your output device to send either HLG or PQ output, usually in the Playback Preferences menu, and configure your display to match if needed. High bit depth color makes a big difference for HDR content. By default, Premiere plays back at 8 bit color, but when Maximum Bit Depth is enabled in the Sequence Settings->Video Previews, it then reprocesses paused frames at 32bit. But enabling “High Quality Playback” in the Program Monitor Wrench Menu, will force 32 bit processing all the time. This requires more computing power, but you will definitely see banding at 8 bit with HDR content.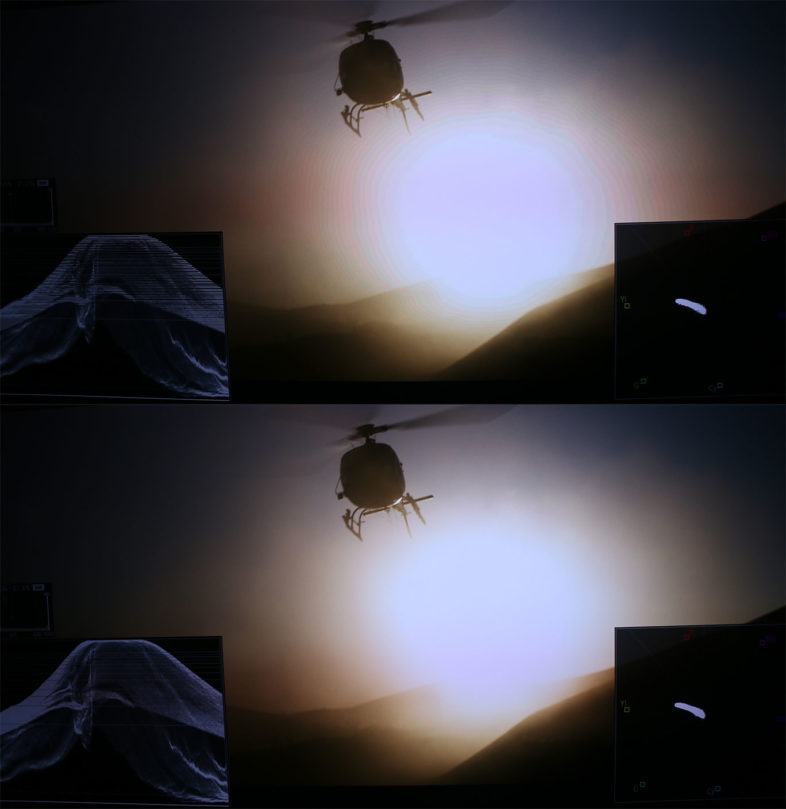
 There is also a new Project setting available, allowing you to select the HDR Graphics White point, with 100 (old SDR), 203 (New de-facto standard), and 300 (very bright) being the three options. Setting to 203 will allow your SDR content to be boosted a bit to better match your HDR content.
  Editing is basically the same until you start playing with color correction. The Lumetri Scopes panel should default to Rec.2100 automatically, but you may need to change the scale to HDR in the lower right corner. The scale on the right becomes logarithmic, with 0-100 being the usual range for SDR footage, 1000 being the limit for most consumer HDR displays, and 10,000 being the theoretical limit of the format. Most of the Lumetri Color tools work similarly to their functions with SDR footage, but certain values may need to be set differently than usual to achieve the same effect as they would in SDR.
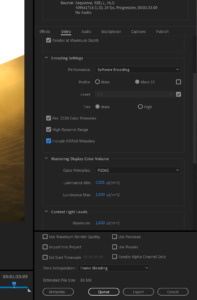 Once you have your finished piece, and want to show it to others in HDR, you have to export it in an HDR format. ProResHQ and ProRes444 will allow you to send the content to others at high quality, as will JPEG2000 and X-AVC Intra, but most people are going to view your HDR content from H.264 or HEVC files. H.264 is beneficial for backwards compatibility, but most HDR enabled devices support HEVC playback, which is a more efficient codec. Either way, you need to enable “Render at Maximum Bit Depth,” and have to select the “High10” profile, to make available the “Rec.2020 Primaries,” “High Dynamic Range” and “Include HDR10 Metadata” check-boxes. Hopefully there will also be HLG options in the future.
Separately, Adobe’s 14.4 release of Premiere Pro includes support for rendering from proxy assets, to decrease export times for draft files, and automatic scene detection to find cuts in edited source material. Both are features that I expect myself and many other editors to get a lot of use out of. Adobe has been shifting their release strategy, with a higher number of incremental updates throughout the year, with this being the fourth feature update in 2020, and I am looking forward to seeing what they are working on next.

